
The following tutorial creates an Amazon VPC with public and private subnets from scratch.
- Creation of the AWS VPC(AWS Virtual Private Cloud):
- AWS VPC is Virtual network of dedicated to your AWS account where you can launch and configure AWS resources.
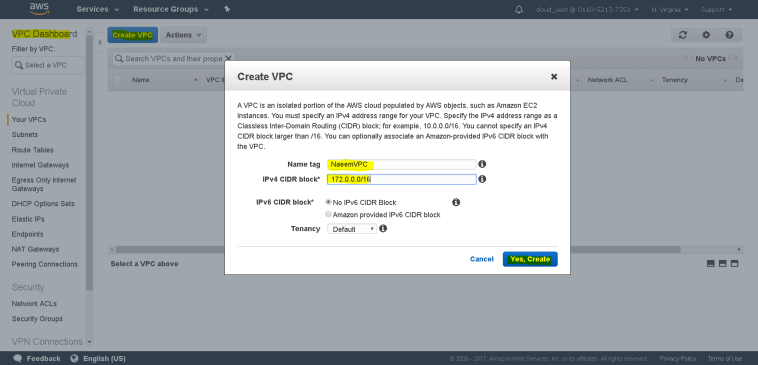
- To Create a VPC – Go to VPC Dashboard and click on “Your VPC” and then on “Create VPC”.
- Then enter the name and CIDR block of the VPC to be created.
- Creation of the Subnets:
- Subnets are sub networks of a VPC where we can launch our AWS resources.
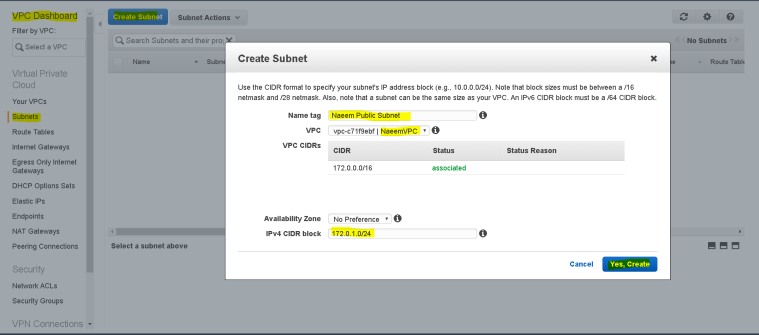
- To Create a Subnet – On the VPC Dashboard and click on “Subnets” and then on “Create Subnet”.
- Then enter the name of the subnet( Naeem Public Subnet ), select the VPC to which we want to add the subnet to, the CIDR block for the subnet and then click “Yes, Create”.
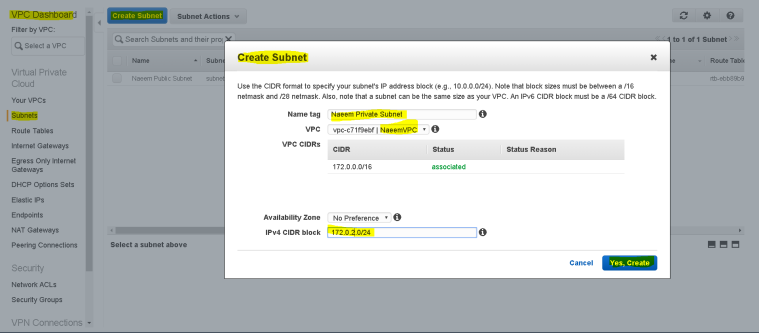
- Similarly, follow the same process to create another subnet – Naeem Private Subnet.
- Creation of Internet Gateway:
- Internet gateways allow internet accessibility inside the VPC.
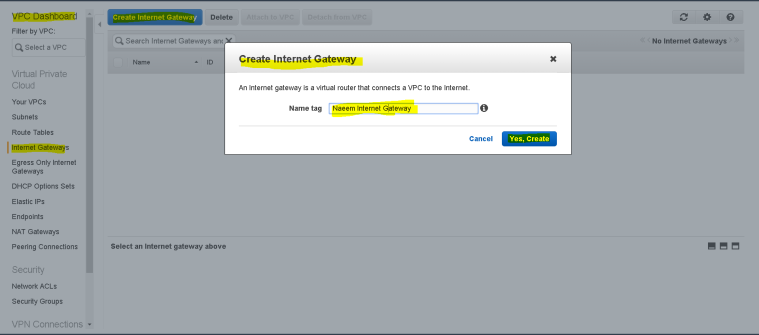
- To Create a Internet gateway – Go to VPC Dashboard and click on “Internet Gateways” and then on “Create Internet gateway”.
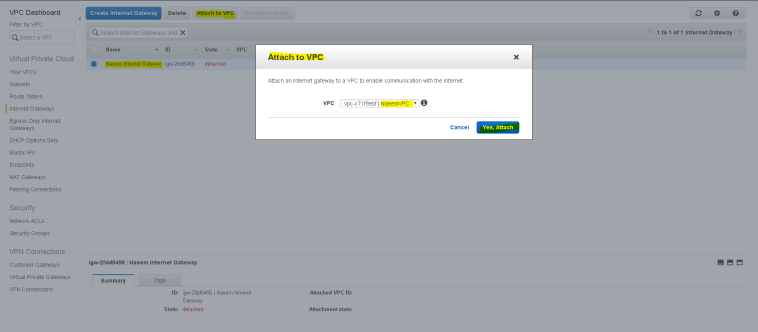
- Enter the name of the Internet gateway and click “Yes, create”.
- Now attach this Internet gateway to the VPC, by clicking on “Attach to VPC”.
- Creation of Public Route tables:
- A route table contains a set of rules, called routes, that are used to determine where network traffic is directed.
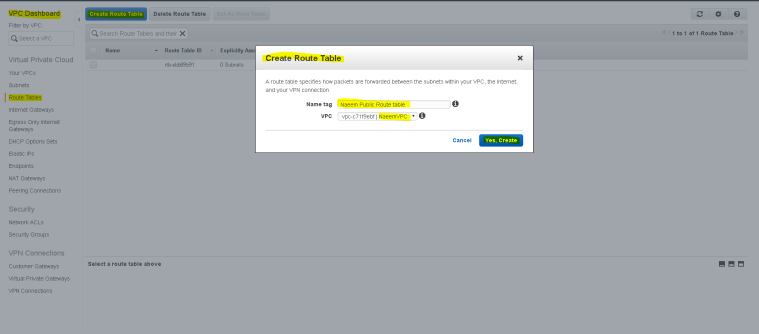
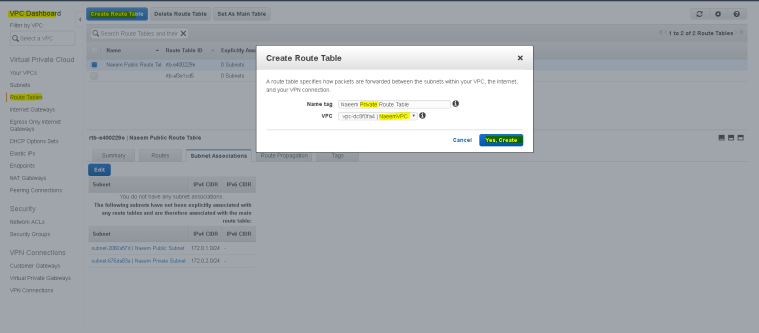
- To Create a Route table – Go to VPC Dashboard and click on “Route tables” and then on “Create Route table”.
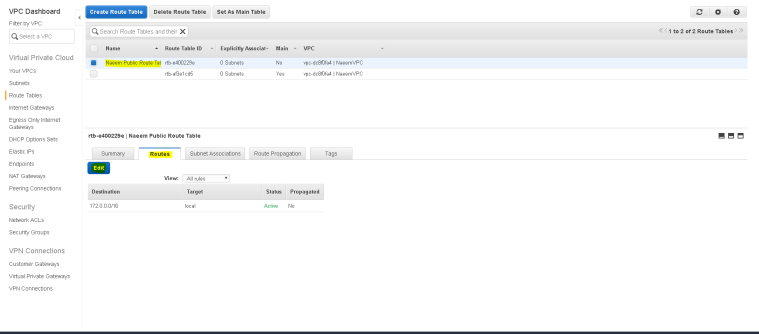
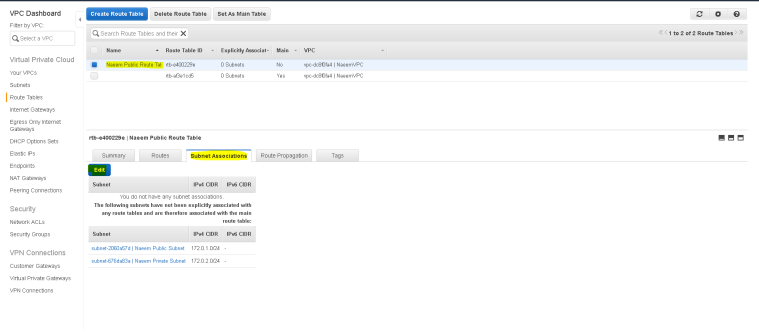
- Now, select “Naeem Public RouteTable” and then click on “Routes” tab to edit “route” for the route table to allow Internet access.
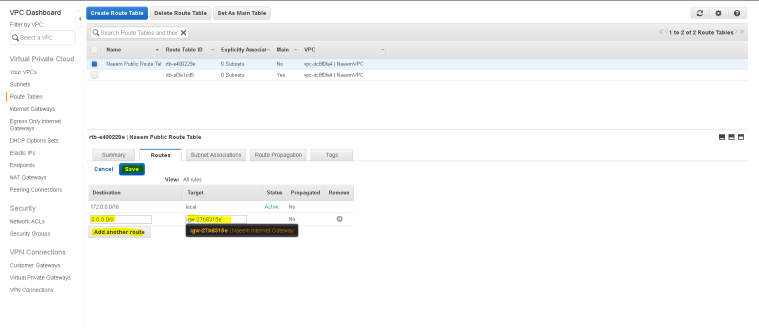
- Then, click on “add another route” to add a route for Internet gateway. Add destination as “0.0.0.0/0″(meaning access from anywhere) and target as the Internet gateway ID and click save.
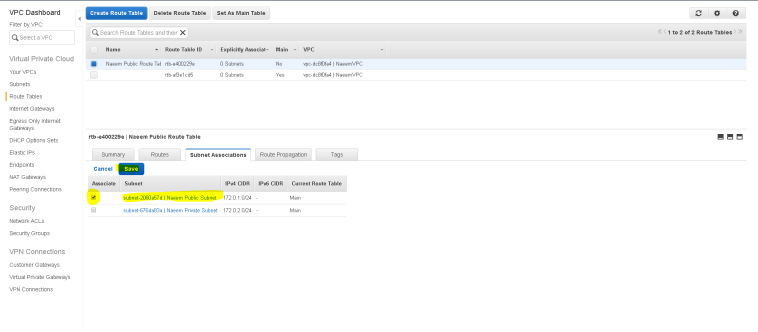
- Now click on “Subnet Associations” tab to “edit” and add the subnet to be mapped to this routing table.
- Now, select the “Naeem Public Subnet” selecting on the check-box and save changes.
- Now “Naeem Public Subnet” is a public subnet and instances launched with a public IP in this subnet will be accessible to the public.
- The other subnet “Naeem Private Subnet” is private and instances launched in this subnet will not be accessible to the public.
- We need to have a NAT Gateway/NAT server(used for private subnets to access the Internet)
- Creation of the NAT Gateway:
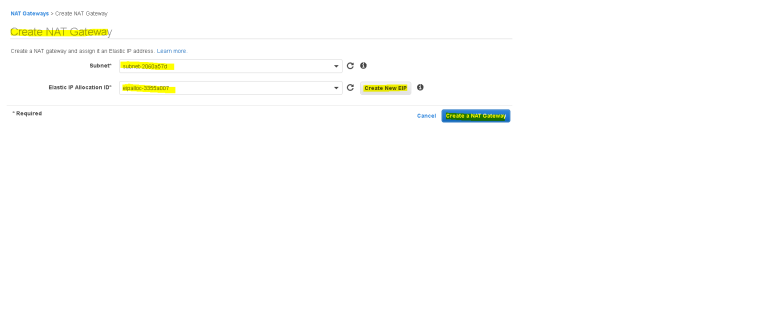
- To create a NAT Gateway – Go to VPC Dashboard and click on “NAT gateways” and then on “Create NAT gateway”.
- Select the public subnet as the location where the NAT gateway will be created and assign an EIP(Elastic IP) to the server(by clicking on “Create New EIP” and then click on “Create NAT Gateway”.
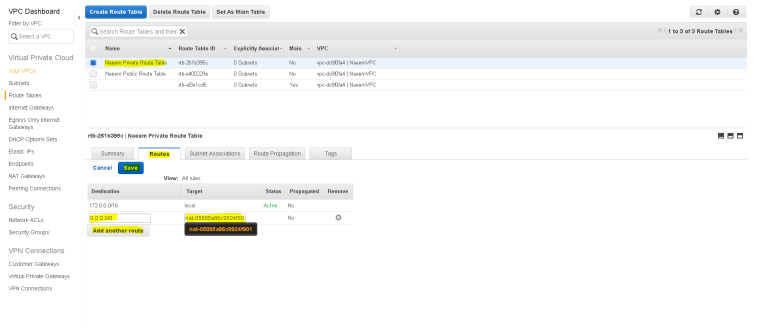
- Creation of the Private Route Table:
- Now we need to create the Private Route table and add the NAT Gateway to the route so that the instances inside the private subnet can access internet.
- Select the “Naeem Private Route Table” and click on “Routes” tab to edit and add the route for NAT Gateway.
- Select “0.0.0.0/0” as destination and the NAT gateway ID as target and save changes.
- Now similarly, click on “Subnet Association” tab to edit and associate the private subnet to this route table.
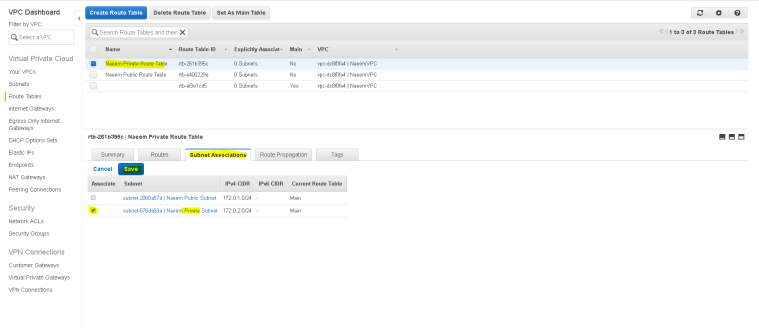
- Now we need to create the Private Route table and add the NAT Gateway to the route so that the instances inside the private subnet can access internet.
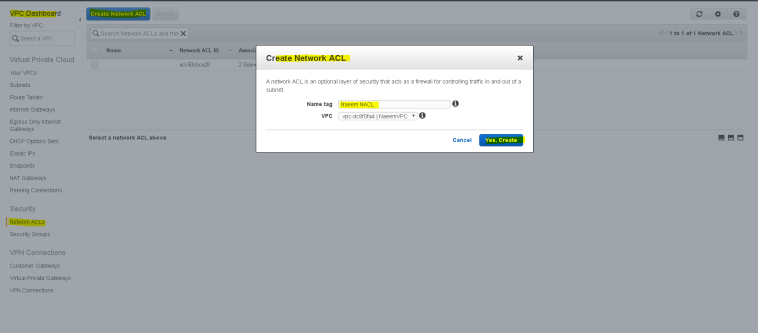
- Adding Network level security to the subnets:
- NACL(Network Access Control List) are used to provide network level security and are stateful(means that you have to grant Inbound and Outbound rules.
- To create a NACL – Go to VPC Dashboard and click on “Network ACLs” and then on “Create Network ACL”, provide a name and select the VPC and save.
- If you are creating a custom NACL then by default it will deny any kind of Inbound or Outbound access ( if you are using a default NACL or the one created through wizard then, it will allow all inbound and outbound access).
- We are creating a custom NACL so all Inbound and Outbound access is denied by default, so we will “edit” it to add new Inbound as well as Outbound Access”.
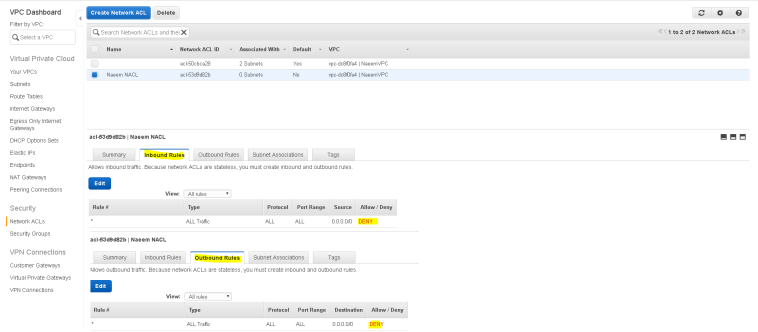
- Lets add Inbound and Outbound rules. The rules are calculated in order from low to high and any explicit deny will override any explicit allow.
- Add “allow” rules for both Inbound and Outbound for SSH(for remote acces), ICMP(for ping), HTTP/HTTPs(for web) and MYSQL(for database).
- All other access will be denied.

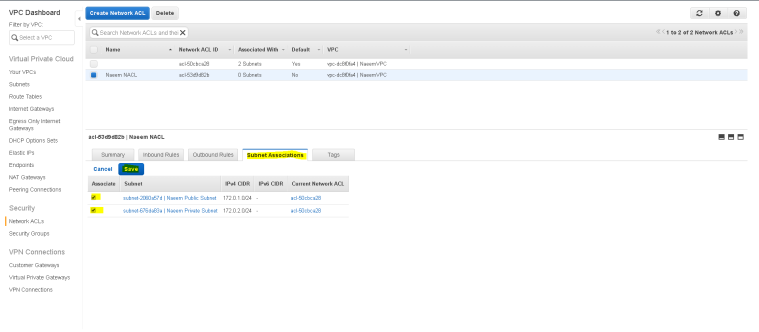
- Now associate both the subnets to this NACL by editing the association from “subnet associations” tab and select both the subnet and save changes.=
- Now we are ready to launch instances in the public as well as private subnets.
- Adding a new instance in public subnet:
- To add a instance – Go to EC2 Dashboard and click on “Instances” and then on “Launch Instance”.
- Follow the step by step wizard
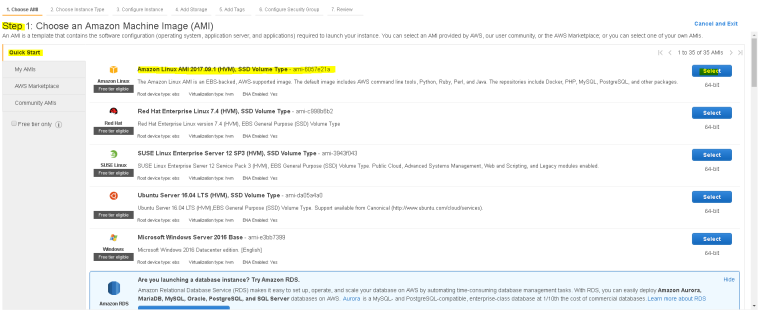
- In step 1 – choose an Amazon AMI – we will select – “Amazon Linux AMI 2017.09.1 (HVM), SSD Volume Type – ami-6057e21a”
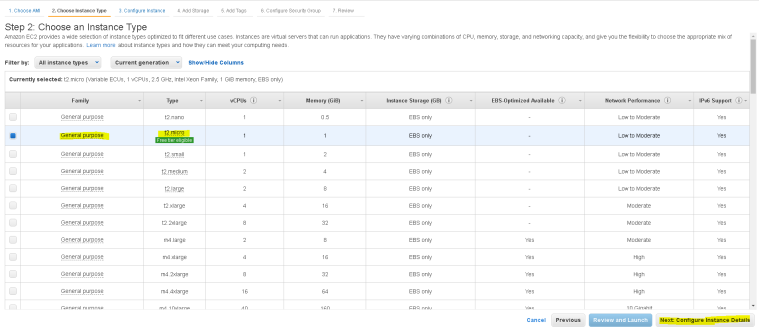
- In Step 2 – choose Instance type based on CPU, memory, processing power – we will select = “general Purpose – t2.micro”
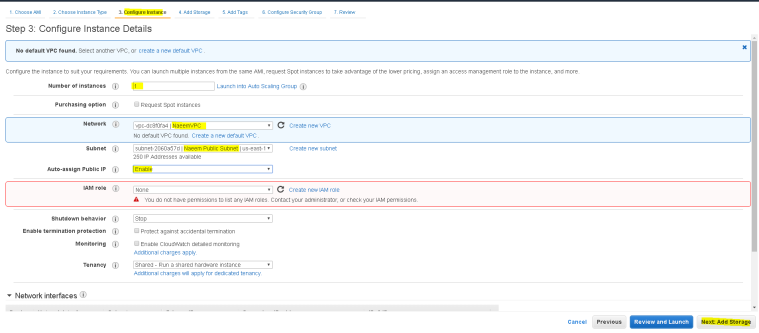
- In step 3 – choose Instance details – select VPC, Subnet and Auto Assin Public IP and leave everything as default
- Leave step 4(select storage) and 5(select tags) as default
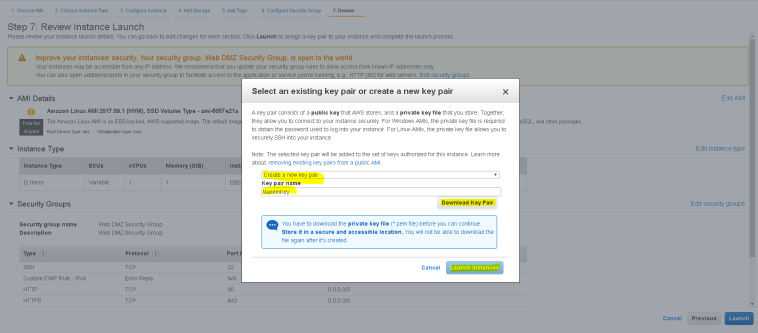
- In Step 6 – choose the security group – we will create a new security group for this instance – we will call it “Web DMZ Security Group”
- Security groups are instance level security for AWS where we can define which ports to open, we will open SSH, ICMP, HTTP and HTTPS for the public facing instance.

- and then “Review and Launch Instance”, you will be prompted to create a key pair and download the key pair for security and launch the instance.
- Wait for the instance to get ready and use SSH tools like Putty or Mobaxterm to connect to this instance.
- Follow the “connect” instructions to connect to this server.
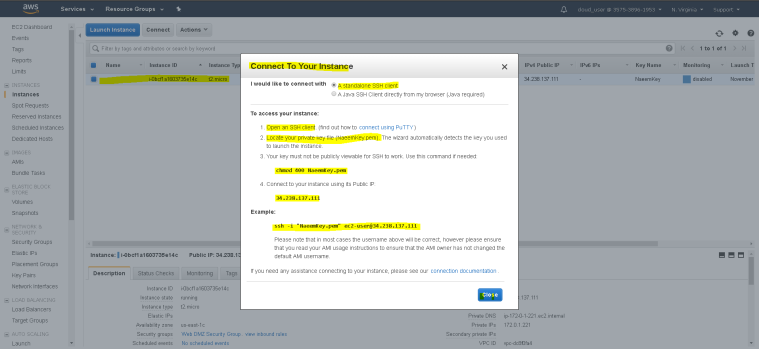
- Using Mobaxterm to connect to this instance – enter the public IP , user name ( by default as ec2-user and the private key.

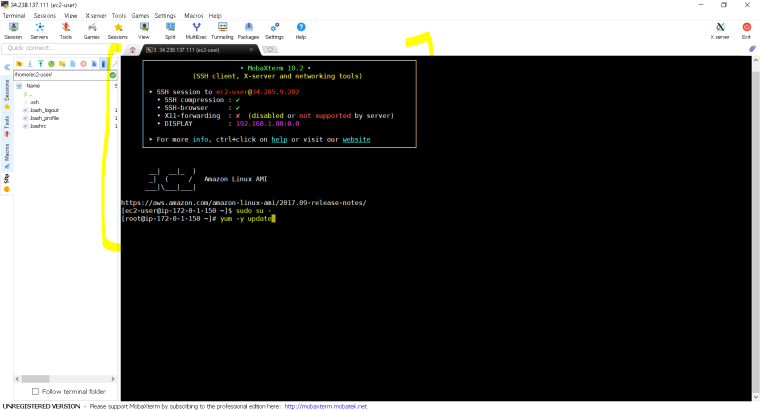
- Here is the connected server-
- In step 1 – choose an Amazon AMI – we will select – “Amazon Linux AMI 2017.09.1 (HVM), SSD Volume Type – ami-6057e21a”
- Adding a new instance in private subnet:
- To add a instance – Go to EC2 Dashboard and click on “Instances” and then on “Launch Instance”.
- Follow the step by step wizard –
- Follow similar steps 1 to 7 as in the previous public instance creation except that step 3 as this time we will launch the instance in private subnet with Public IP disabled.

- Also since we are not using VPN, that’s we can connect to this private instance only though a jump server or a server in public subnet.
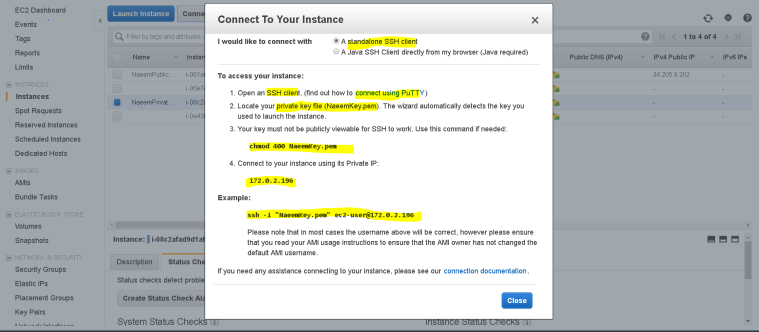
- We will have to upload the private key to the public server(not the best practise, but for the sake of example here), change the mode using chmod and then use “ssh” as per the connection instructions below.
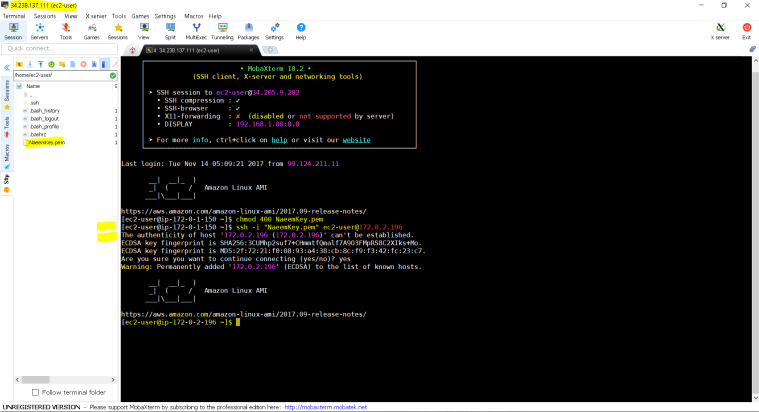
- Lets upload the private key to the public instance and change mode using chmod
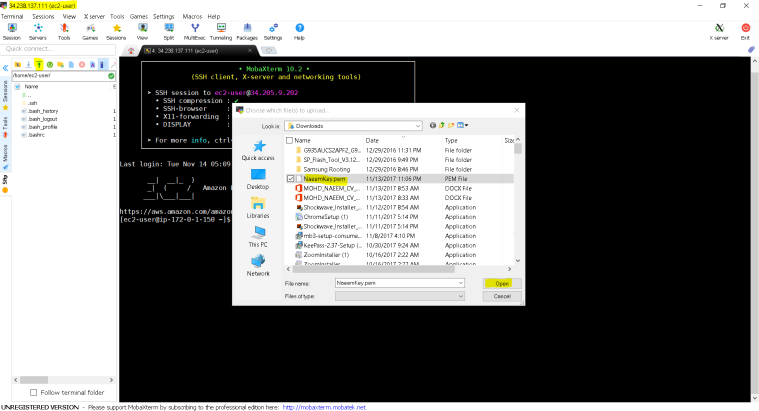
- You can see the upload file “NaeemKey.pem” in the right side pane.
- In left side pane, we are using “chmod 400 NaeemKey.pem” command the change the security mode of the private key.
- Finally we are using – ssh -i “NaeemKey.pem” ec2-user@172.0.2.196 where 172.0.2.196 is the private IP of the instance launched in the private subnet.
- Follow similar steps 1 to 7 as in the previous public instance creation except that step 3 as this time we will launch the instance in private subnet with Public IP disabled.
Hope this tutorial helps.
